October 15th, 2009

Tips: Steak on a Charcoal Grill

Happy day! Super-Cali-Fragilistic Sister-in-Law Chef Sandy weighs in today on the use of a charcoal grill versus gas.

There are some fierce proponents of each. Here, Sandy tells us the ins and outs of using charcoal to cook that gorgeous steak. Enjoy!

612708f8-61b0-4366-a6cb-5a478b4c60cc_300

Using A Charcoal Grill

Right before Hurricane Ike hit Houston last year, my husband and I decided we needed to have a grill, just in case we lost electricity for a while.  We had left our old gas grill behind when we moved, and had planned on replacing it when we got settled in our new home.  Well, the day before a hurricane hits is no time to buy a grill, we discovered, and we were not able to find a gas grill anywhere in the Houston area.  The only thing we could find was a few bags of charcoal and a camping sized charcoal grill.

Given that there were no other options, we went with the charcoal grill and quickly learned some of the nuances which make this just a little more complicated then firing up a gas grill.  I do feel like I have mastered a few tricks which I would like to share with you, whether you are a new user, or someone who may just do the charcoal thing occasionally, like when you are camping or picnicking at a state park.

If you are a long-time charcoal griller, you’ll probably be familiar with all of this.  My intended audience is those who have not often had success with charcoal, but would like to give it a try.  Gas grills are certainly a convenient option, but if for whatever reason or preference drives you to use a charcoal grill here are some things that might help you have success.

The charcoal grill has two grates — one is intended to support the charcoal at the bottom of the grill, the other is to cook your food on.  The lower grate holds the charcoal up slightly from the bottom of the grill so that oxygen can get to the pile of briquettes.  Use about 6 total sheets of newspaper, rolled tightly into 2 rolls. Form an X at the bottom of the grill with the 2 rolls of newspaper, and place the bottom grate on top of the newspaper to hold it in place.

Next, form a pyramid of the charcoal, so that it will burn efficiently and not require too much starter fluid.  The amount of charcoal you will want to use is limited by the size of the grill, of course, but also should be determined by how much you want to cook.  A couple of burgers may only need something like 30 briquettes, but pounds and pounds of steaks and chicken will take longer to cook, therefore you will need a fire that burns longer — plus more briquettes.

Once you have a nice square pyramid (ask your fourth grader!) squirt the pile with the recommended amount of lighter fluid.  Don’t forget to read the package.  It is usually just a couple-second squirt.  Don’t be that guy who squirts half a bottle of lighter fluid onto a pile of burning charcoal – this is dangerous and foolish and stinks!  Put the top back on the bottle and put it far from the fire, before you light a match.  Light the ends of your paper tubes, which should fairly quickly catch the pile of briquettes on fire.

After about 20 minutes, when the briquettes are covered with ash and the flames have died down, use a fire-proof implement to spread the hot charcoal evenly on the grate.  Please use every safety precaution.  Sparks can and will fly up.  Replace the clean cooking grate on top of the hot charcoal and you are ready to cook.

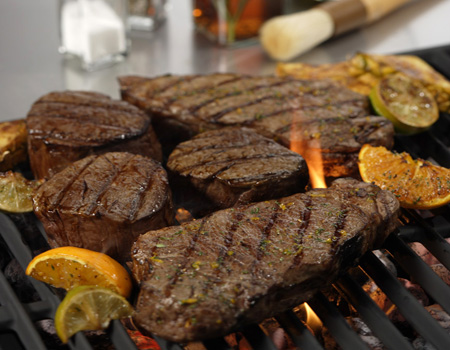
Enjoy the smokier flavor that charcoal grilling imparts to your food — you may become a convert!

Photo of Weber charcoal grill courtesy of HomeDepot.com.


October 6th, 2009

Steak and Grilled Broccoli

broccoli2

Tired of that baked potato? Super Sister-in-Law Chef Sandy gives us some ideas for what to eat with that tasty steak you’re planning. And – beware – it’s healthy for you. Mwuahahahahahaha!

(That was an evil laugh.) Here’s what she says . . .

What are you going to eat alongside of that gorgeous steak tonight?  Might I suggest broccoli, cooked right beside it on the grill?  Broccoli, as we all have heard, is one of nature’s super foods.  It has a ton of vitamin C, as well as other antioxidants and nutrients which are fabulous for you.

The problem with broccoli for many people is the bitter taste and/or texture.  By cooking it with a dry cooking method, the broccoli will release some of its natural sugars, covering up some of that bitterness, and the texture is less soggy than broccoli prepared in water. Here’s a super way to cook it that will change both of those characteristics, and make it easy to prepare, right next to your steak.

broccoli

Broccoli on the Grill

1 pound fresh broccoli, washed

2 Tbsp Olive Oil

2 tsp of kosher salt, if desired

1 tsp of black pepper

1 tsp red pepper flakes, if desired

1 clove of garlic, if desired

½ onion, cut into ¼” rings, if desired

Wash broccoli well, then cut into 1 inch florets.  Cut the stem pieces into ¼” rounds, so that they cook in the same time as the florets. 

Using a heavy chef’s knife, smash the clove of garlic to remove the peel, cut off the hard ends and then smash it with kosher salt.  The salt acts as an abrasive and will allow you to smash the garlic into a paste.  Place this garlic paste, peppers and olive oil into a large mixing bowl and combine with the olive oil.  Toss the prepared broccoli and onion rings into the mixing bowl, mixing to combine it well and make sure that all of the broccoli has some of the flavorful oil on it.

This broccoli will only take a few minutes to prepare on a hot grill, so if you want to serve it piping hot with the steak, you will need to start the steak first.  The advantage to this dish is that it tastes great even at room temperature, so feel free to prepare it first if you want to enjoy it that way.

To cook the broccoli, place a large piece of heavy duty foil (or a specially designed grill implement) on the grates of the grill.  Toss on the broccoli, in a single layer, and allow to cook, covered for a few minutes or until the broccoli begins to brown.  You will have some pieces which get very brown, others not so much.  I think this improves the appeal of this dish. Using tongs, flip the broccoli over and cook until desired doneness is reached.  This is a dish which will need to be tended to fairly closely — it would burn if left more than a few minutes because of the delicate size of the pieces.  Remove to serving platter, and serve with a squeeze of lemon, if desired.


September 3rd, 2009

What kind of steak should I buy?

What cut of steak should I buy

School is back  in session so what better time to brush up on a lesson that is near and dear to my heart?  Yes, class, it’s time for a lesson on steak.

Chef Sandy goes through the ins and outs of cuts for us here. And if you pay attention you might just get an extra recess.

I often get the question, “What kind of steak should I buy?”

  • Well, that kind of depends on a few factors…
  • What do you want to spend?
  • What sort of texture do you want?
  • What is the doneness level that you prefer?
  • What kind of fat percentage do you want?
  • What cooking method are you planning to use?

Here is a brief overview:

Many of the cuts of beef that are used for steaks are cut from the loin portion of the beef.

Most of us are well aware that filet mignon or beef tenderloin (and Chateaubriand) are all part of the same very expensive cut of beef.  There is very little waste, very little work for the cook (little trimming is necessary) and it is appropriate for anything and anyone who likes steak, even at the fanciest meal.  The texture of tenderloin is very tender, and some say that the flavor is not assertively beefy enough, but that is really a matter of choice.

Many times this cut of meat will be served with a sauce or an equally luxurious topping like a bleu cheese topping or it will be wrapped in bacon, all of which will enhance the flavor. This is the priciest cut of steak, but again, there is no waste, and not too much shrinkage, so what you buy (and pay for) is what you get to eat.

But what is the difference between a T-bone and a Porterhouse?  How about a KC Strip and NY Strip?

A Porterhouse is a steak with a T-bone in the middle, and a large portion of both tenderloin and strip loin.  A T-bone is the same steak, but the tenderloin portion is usually smaller than a silver dollar, or even non-existent.  The bone-in nature of this steak usually yields great flavor, and oftentimes at the grocery store the T-bones actually have a large filet portion (and should therefore be labeled as the more expensive Porterhouse — shh, we won’t tell).

The difference between a KC Strip and a NY Strip is basically a marketing difference.  Depends on where you are from.  Either could come with a bone, but often not, and both are a generally oblong shaped steak, with not much visible marbling, but fat around the outside (non-bone side) of the meat.  Depending on where you shop, and what part of the country you are from, these steaks are often in the high-middle of the price range for quick cooking steaks.

A ribeye or Delmonico steak is well marbled with fat, and because of its high fat content, can be cooked more well done and still remain juicy.  This kind of steak will flame up on the grill, so it should definitely be watched carefully.  One trick I have used is to first grill the steak on the grate to get grill marks (and flavor) and then put heavy duty foil on the grill and put the steaks on top to finish cooking them without incinerating them.

Sirloin steaks on the other hand, may need marinating to become juicy.  They should not usually be cooked to more than medium doneness and oftentimes are sliced thinly against the grain for presentation to help ensure a tender dining experience.  Flank steak and skirt steak (fajitas) are also cuts of meat which should be marinated, cooked quickly to a med-rare or medium doneness and sliced across the grain for tenderness.

Round steaks are usually too tough to use a direct cooking method, and are better suited to another preparation method like braising — think Swiss steak.  Brown, then cook the steak until tender in flavor liquid (gravy) for a few hours.  Many different cultures have variations on this theme, and a thin round steak can also be used as a wrapper for flavorful ingredients, with the whole bundle braised in flavorful liquid for a delicious meal.  Italians call it Braciole (may also be made with flank steak) Germans have Rouladen.  Long story short, braise it for great taste and tenderness.

If you are making Chicken Fried Steak, the traditional choice is a tenderized round steak.  This is a piece of meat which has been put through a process which mechanically pounds the steak and breaks up the tissues with thousands of little blades.  This is the only way to use this steak in a quick cooking manner, otherwise you would end up with shoeleather.  I have seen Chicken Fried Ribeye and Chicken Fried Filet on some fancier menus here in Texas, and since these are more tender pieces of meat, no mechanical tenderizing is necessary. Tasty, and about as decadent as you can get…

If you have any questions about a piece of meat you are considering buying, just ask.  At many grocery stores or even Web site, sometimes they have flip guides to cuts of meat and preferred cooking method, and sometimes even stickers on the actual meat packages which say “Great for the Grill” or “Best for Braising” or some similar catchy tips.  Or better yet, try some new choices next time you go to your favorite steak restaurant, and make a note to yourself about what you like and the preparation methods you enjoy.

Then you can try them out at home!


You are currently browsing the archives for the Tips from Sandy category.

Subscribe

Subscribe in a reader
(or) Subscribe via Email


About Me

Hi! My name is Dena P., and I love steak. In fact, I’ve been on a quest for the perfect steak for a few years now.

I love experimenting with food and I like to get my family, friends and neighbors involved. They add a lot to my cooking experience by helping me perfect techniques and sharing recipes.

Read More About Me »

Steak Widget

Archives