September 4th, 2009

How to Ruin a Burger – Why, Oh Why?

Ed Levine knows good food.  And this Labor Day weekend I plan to cook some burgers for friends and family.

I don’t want to mess this up . . . so he’s going to help. Why on earth would you chance ruining a perfectly great burger???

How to Ruin a Burger

Here are his warnings against making the 6 most common ways to ruin a burger.

1. Not Sticking to Salt Plus Beef: Use Kosher salt (and pepper!) on both sides of the beef patty before slapping it onto the grill. Salt is a glorious thing for red meat-it draws out the natural juices and helps with the charring. Try to avoid turkey, bison or other alternative meat options, which have a much higher risk of moisture and flavor deficiency. Don’t get crazy here, just stick with beef. Motz even says, “if it’s not beef, it’s not a burger.” Here is Bobby Flay’s recipe for the perfect beef burger.

2. Bad Beef-to-Bun Balance: There’s no hard-and-fast ratio for beef-to-bun balance. It’s like Supreme Court Justice Potter Stewart said in ?Jacobellis v. Ohio (1964) “I know it when I see it.” In the case of beef-to-bun balance, taste it. Beef-to-bun balance all depends on your patty size. If you’re cooking up a thin patty, don’t use a jumbo bun-you don’t want a mouthful of bread and hardly any meat, do you? When in doubt, make your patties bigger or stack a double burger. It’s bettern to err on the side of more meat.

3. Condiment Overload: Building a burger with “everything” is a huge mistake. Avoid the garbage pail approach. In most cases, going beyond onion and ketchup (arguably the most popular condiment) masks the beef taste and creates an absurd flavor profile. Seriously, a pastrami burger? Pastrami is not a condiment. However, we will make one exception for Fatty Melts-when grilled cheeses become condiments.

4. Wasting Precious Burger Juices: If you’re cooking the burgers over a flame, pressing down on them will send the precious meat juices straight into the coals. Those juices are valuable-they belong in your mouth. While it’s very tempting to apply pressure with a spatula, don’t. Unless you want a dry hockey puck. Sometimes they do it on TV, but just close your eyes.

5. Overcooking: This should be a crime recognized by the federal government. For the popular medium-rare, grill the meat exactly three minutes on one side (keeping the grill lid closed) and two minutes on the other. If you’re going to add cheese, let it melt on top for another minute (and keep that cover closed!).  We like our burgers medium rare, so much we’ve even sent them back at restaurants when they go beyond medium.

6. Machine-Formed Patties: If you really want to ruin your burger, try a machine-formed frozen patty! No, don’t. While making every ingredient from scratch is not necessary (see: Heston Blumenthal’s Blumenburger) try to form your own patties from ground chuck (80 percent lean is good) purchased at your nearest market or better yet, butcher.

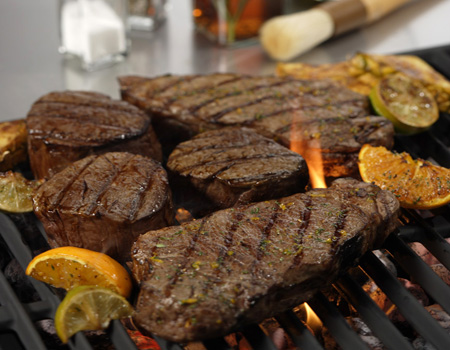
Photo and excerpt courtesy of food.yahoo.com.


September 3rd, 2009

What kind of steak should I buy?

What cut of steak should I buy

School is back  in session so what better time to brush up on a lesson that is near and dear to my heart?  Yes, class, it’s time for a lesson on steak.

Chef Sandy goes through the ins and outs of cuts for us here. And if you pay attention you might just get an extra recess.

I often get the question, “What kind of steak should I buy?”

  • Well, that kind of depends on a few factors…
  • What do you want to spend?
  • What sort of texture do you want?
  • What is the doneness level that you prefer?
  • What kind of fat percentage do you want?
  • What cooking method are you planning to use?

Here is a brief overview:

Many of the cuts of beef that are used for steaks are cut from the loin portion of the beef.

Most of us are well aware that filet mignon or beef tenderloin (and Chateaubriand) are all part of the same very expensive cut of beef.  There is very little waste, very little work for the cook (little trimming is necessary) and it is appropriate for anything and anyone who likes steak, even at the fanciest meal.  The texture of tenderloin is very tender, and some say that the flavor is not assertively beefy enough, but that is really a matter of choice.

Many times this cut of meat will be served with a sauce or an equally luxurious topping like a bleu cheese topping or it will be wrapped in bacon, all of which will enhance the flavor. This is the priciest cut of steak, but again, there is no waste, and not too much shrinkage, so what you buy (and pay for) is what you get to eat.

But what is the difference between a T-bone and a Porterhouse?  How about a KC Strip and NY Strip?

A Porterhouse is a steak with a T-bone in the middle, and a large portion of both tenderloin and strip loin.  A T-bone is the same steak, but the tenderloin portion is usually smaller than a silver dollar, or even non-existent.  The bone-in nature of this steak usually yields great flavor, and oftentimes at the grocery store the T-bones actually have a large filet portion (and should therefore be labeled as the more expensive Porterhouse — shh, we won’t tell).

The difference between a KC Strip and a NY Strip is basically a marketing difference.  Depends on where you are from.  Either could come with a bone, but often not, and both are a generally oblong shaped steak, with not much visible marbling, but fat around the outside (non-bone side) of the meat.  Depending on where you shop, and what part of the country you are from, these steaks are often in the high-middle of the price range for quick cooking steaks.

A ribeye or Delmonico steak is well marbled with fat, and because of its high fat content, can be cooked more well done and still remain juicy.  This kind of steak will flame up on the grill, so it should definitely be watched carefully.  One trick I have used is to first grill the steak on the grate to get grill marks (and flavor) and then put heavy duty foil on the grill and put the steaks on top to finish cooking them without incinerating them.

Sirloin steaks on the other hand, may need marinating to become juicy.  They should not usually be cooked to more than medium doneness and oftentimes are sliced thinly against the grain for presentation to help ensure a tender dining experience.  Flank steak and skirt steak (fajitas) are also cuts of meat which should be marinated, cooked quickly to a med-rare or medium doneness and sliced across the grain for tenderness.

Round steaks are usually too tough to use a direct cooking method, and are better suited to another preparation method like braising — think Swiss steak.  Brown, then cook the steak until tender in flavor liquid (gravy) for a few hours.  Many different cultures have variations on this theme, and a thin round steak can also be used as a wrapper for flavorful ingredients, with the whole bundle braised in flavorful liquid for a delicious meal.  Italians call it Braciole (may also be made with flank steak) Germans have Rouladen.  Long story short, braise it for great taste and tenderness.

If you are making Chicken Fried Steak, the traditional choice is a tenderized round steak.  This is a piece of meat which has been put through a process which mechanically pounds the steak and breaks up the tissues with thousands of little blades.  This is the only way to use this steak in a quick cooking manner, otherwise you would end up with shoeleather.  I have seen Chicken Fried Ribeye and Chicken Fried Filet on some fancier menus here in Texas, and since these are more tender pieces of meat, no mechanical tenderizing is necessary. Tasty, and about as decadent as you can get…

If you have any questions about a piece of meat you are considering buying, just ask.  At many grocery stores or even Web site, sometimes they have flip guides to cuts of meat and preferred cooking method, and sometimes even stickers on the actual meat packages which say “Great for the Grill” or “Best for Braising” or some similar catchy tips.  Or better yet, try some new choices next time you go to your favorite steak restaurant, and make a note to yourself about what you like and the preparation methods you enjoy.

Then you can try them out at home!


August 19th, 2009

Steak Recipe: Bleu Cheese Crusted Filet

Bleu Cheese Crusted Filet

So, a couple of weeks ago I received a question from a reader asking about a recipe for a filet mignon encrusted in bleu cheese.

This, of course, was a new one on me so I posed the question to Super Sister-in-Law Chef  Sandy.

And, as expected, she used to prepare this delectable dish when she toiled in the kitchen of the Ritz-Carlton.

Here, she shares her secrets for making it just like the pros!

(And check out that picture she took — isn’t it to die for???)

Here’s what she has to say . . .

Recently I was asked a question about how to make a bleu cheese crusted filet like someone’s favorite restaurant did it.  There are several ways to do this, depending on the outcome you are looking for.

You can simply cook your steak to desired doneness via any combination of direct and indirect cooking that works for you (sauté/oven, over the hot coals/on the side) and then simply top the steaks with bleu cheese for a moment, just like you would top a cheeseburger, thereby insuring a gooey topping.  Or, you could put the whole thing in a fiery hot oven which would brown the cheese.  My favorite method is the one below. You make a cheese crust, using breadcrumbs, butter and seasonings, in addition to bleu cheese.  You could even add pecans or walnuts to this versatile topping, or substitute another cheese if you like.  Just keep the ratio about ½ breadcrumbs and ½ other stuff.  Plus enough melted butter to hold it together. This mixture is finished on top of the steaks and you get a crunchy, cheesy topping which I think is a great contrast to the very tender steak.

Bleu Cheese Crusted Filet of Beef

2 5-6 oz Tenderloin of Beef Steaks (Filets)

Salt and Pepper

½ cup panko (Japanese style) bread crumbs, or fresh breadcrumbs

1 Tbsp butter

½ tsp garlic or onion salt, or

1 tsp kosher salt, if desired

4 turns fresh ground pepper

1 teaspoon minced fresh herbs, such as rosemary or parsley

½ cups crumbled bleu cheese

1 teaspoon Dijon-style mustard

Canola or Peanut Oil, for searing

Allow the steaks to set at room temperature for about 30 minutes to equalize the internal temperature for more even cooking.

Meanwhile, prepare crumb topping:  Combine panko or fresh bread crumbs and cold butter in microwaveable bowl.  Season with flavored salt or kosher salt and pepper.  Heat on high in microwave until butter melts, stirring every 30 seconds to distribute the browned crumbs.  Remove from microwave, allow to cool for a few seconds and add the herbs and bleu cheese.  Use a fork to distribute the bleu cheese into the crumbs without making it into a paste.  Taste for seasoning, set aside.

Preheat oven to 500°F.

Just before searing, season the filets with salt and pepper.

To sear the meat, preheat shallow sided sauté or frying pan over medium high heat until it is very hot.  Add 1 teaspoon canola oil and heat until the oil is shimmering.  Without crowding them, carefully add the steaks to the hot pan.  Do not move them for about 90 seconds, in order to ensure a nice crust.  Using tongs, carefully brown all sides of the steak, each time allowing the crust to form before disturbing the steaks.

When well-seared, remove steaks to an open baking pan to rest until the final cooking.

Everything may be prepared ahead up until this point, as much as a day in advance.  Allow steaks to come to room temperature if they are cooked ahead and refrigerated.

When you are about 10 minutes out from serving time, finish the steaks in the preheated oven. The time this will take will depend on the doneness you desire and the thickness of your steaks.  For the 6-oz filet pictured, which was a traditionally shaped (i.e. tall) filet, prepared medium rare, about 8 minutes of total oven time was required.

First, put the steaks into the oven for 5 minutes without topping.  Then remove from the oven and carefully brush mustard onto steaks to allow the crumb mixture to adhere. Just a thin coat — you may not need all of it, depending on the surface area to cover.  Then simply divide the crumb mixture over the steaks and return to the oven.  Watch carefully, they will burn quickly.  Check after 2 minutes; my steaks took about 3 minutes to get the topping brown and bubbly.

Allow the steaks to rest a minute as you prepare the plates for service, then serve and enjoy!


Archives